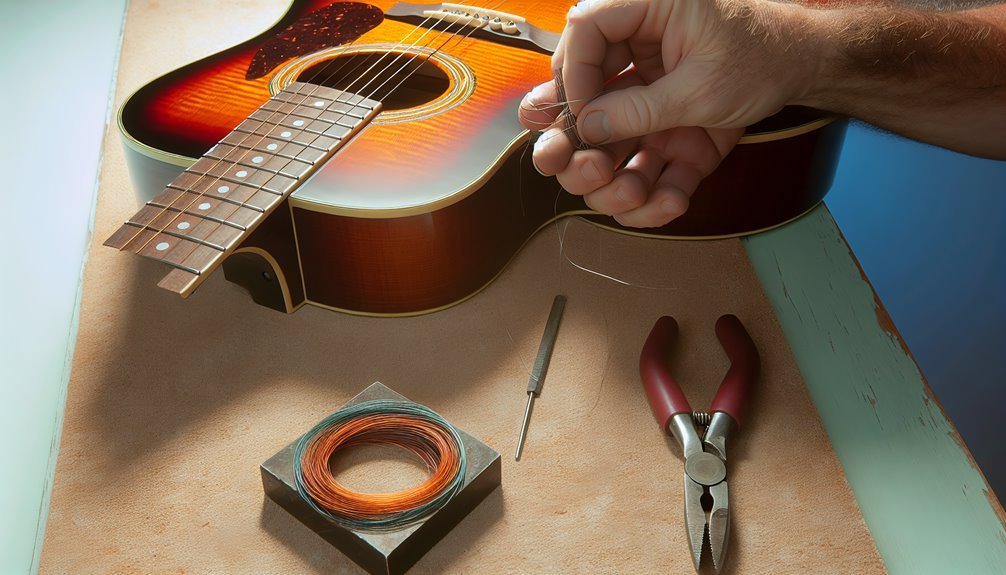
Changing guitar strings is super easy once you get the hang of it! First, gather some essential tools: new strings, a string winder, wire cutters, a tuner, and a cloth. I always clean my guitar while the strings are off—great chance to keep it in top shape! Loosen and remove the old strings, then insert the new ones through the bridge and up to the tuning pegs. Wind them neatly, tune, and don't forget to stretch the strings gently after installing them! Trust me, keeping your strings fresh makes a huge difference. Stick around, and I'll share more handy tips!
Key Takeaways
- Gather necessary tools like new strings, a string winder, wire cutters, a tuner, and a cleaning cloth before starting.
- Loosen and remove old strings by snipping them near the tuning peg, then clean the guitar body and fretboard.
- Insert the ball end of each new string through the bridge, then wind the non-ball end around the tuning peg securely.
- Tune the strings in order from the lowest to the highest pitch using an electronic tuner for accuracy.
- Gently stretch the strings after installation, recheck tuning, and trim excess string ends to prevent injury.
Preparing for Restringing
When it comes to changing guitar strings, having everything ready makes a world of difference. I can't stress enough how essential it's to set up a stable workspace. Place your guitar on a towel on a flat surface to avoid scratches. Trust me, it'll save you from the heartache of a damaged finish.
Now, let's gather our essentials. You'll need new strings, of course, and a string winder to speed up the process. Don't forget wire cutters for snipping the old strings and tweezers for bridge pins.
Familiarizing yourself with the components, like the saddle, tuners, and nut, will help you know exactly where and how to install those new strings correctly.
While the strings are off, take this golden opportunity to clean your guitar. A quick wipe down of the fretboard can do wonders and checking the tuning pegs will guarantee everything's in prime shape.
Tools You Will Need
Alright, let's tackle the tools you'll need for changing your guitar strings!
Trust me, having the right gear not only makes the job easier, but it also guarantees your guitar sounds its best.
I'm excited to share the essentials that'll set you up for success!
Essential Tools Overview
Changing guitar strings isn't just about the strings themselves; it's about having the right tools at your fingertips. Trust me, using the proper equipment makes the process smoother and more enjoyable.
Here's a quick rundown of what you'll need:
- New set of strings – Choose the right gauge for your guitar and style.
- String winders – This nifty tool speeds up the winding process and saves your fingers from strain.
- Wire cutters – Essential for trimming any excess string length, keeping things neat and tidy.
- Tuner – After you've installed your new strings, you'll want to verify they're perfectly tuned.
Having these tools handy won't only make string changing easier, but it'll also elevate your guitar maintenance game.
Don't forget a cleaning cloth to wipe down your guitar during the process! A guitar stand is also a great investment for maintaining a stable working position.
Preparation Techniques Explained
Getting ready to change your guitar strings is all about setting the stage for a smooth process. First things first, gather your tools for string changing. You'll need new guitar strings of the right gauge, a string winder for speed, wire cutters for trimming excess, and a tuner to nail that perfect pitch. Trust me, having these tools at hand makes a world of difference.
Next, create a clean workspace. Lay your guitar on a towel on a flat surface. This not only prevents scratches but also gives you easy access to everything you need during the string change.
While you've got those strings off, grab a polishing cloth to clean the fretboard and body, keeping your instrument in top shape.
Familiarize yourself with essential components like the saddle, nut, and tuning pegs. Understanding these parts will simplify your string installation process immensely.
And if your guitar has a pin bridge design, having tweezers nearby can be a lifesaver for removing those pesky bridge pins. With these preparation techniques, you're now ready to tackle the string change like a pro!
Identifying When to Change Strings

When it comes to changing guitar strings, I can't stress enough the importance of keeping an eye on their condition.
If I notice my strings looking tarnished or if the sound gets dull, it's definitely time for a change.
Trust me, fresh strings not only look better but also bring your music back to life!
Visual Indicators of Wear
You mightn't realize it, but the condition of your guitar strings can greatly affect your sound.
If you want to achieve that rich, vibrant tone, you need to pay attention to some key visual indicators of wear. Here's what I look for during a quick visual inspection:
- Tarnished Appearance: If your strings look dull, blackened, or tarnished, it's a sure sign they're old strings and need replacing.
- Fraying or Broken Strands: Any visible fraying or broken strands is a red flag. Don't ignore these signs!
- Rust: If your strings feel rusty or rough, it's not just uncomfortable—it impacts playability too.
- Lifespan: I recommend changing strings every 1-2 weeks if you play often. Regularly monitoring their condition will enhance your overall sound and performance.
Taking care of your guitar strings is essential for mastering your sound.
Don't wait until they sound dull or thuddy; keep an eye on these indicators. Trust me, your fingers and ears will thank you when you keep your strings fresh!
Sound Quality Changes
How can you tell if your guitar strings are ready for a change? If you're like me, you can feel it in the sound quality. Over time, strings accumulate finger oils and dirt, leading to that dull, thuddy tone that just doesn't inspire. When your electric guitar sounds lifeless, it's time to contemplate a string swap.
Look closely at your strings. If they're tarnished or blackened, that's your visual cue to change your strings. I've learned the hard way that waiting too long can result in a noticeable loss of sustain and clarity, making my playing feel frustrating instead of fluid.
If tuning becomes a struggle or the strings feel rusty and rough, don't hesitate—replace them immediately to regain that beautiful sound.
For regular players like myself, changing strings every 1-2 weeks keeps the sound quality crisp and vibrant. If you play less often, aim for twice a year. Trust me, your electric guitar deserves it!
Removing Old Strings
Removing old guitar strings can feel like a chore, but it's an essential step in keeping your instrument sounding its best. Trust me, tackling this task will pay off in the long run. Here's how I do it:
- Loosen the string: Start with the highest, thinnest string. Use the tuning knobs and pluck the string as you turn to confirm you've got the right one.
- Organize the strings: Gather the loosened strings around the neck pickup. This keeps things tidy and prevents any sharp ends from causing injuries later.
- Cut the strings: Use a pair of wire cutters to snip each string cleanly near the tuning peg. Make sure you remove it completely to avoid any sharp ends sticking out.
- Dispose properly: Toss those old strings in the trash. Keeping your workspace clean is vital, especially when working with potentially dangerous sharp ends.
While you're at it, take this chance to clean your guitar body and fretboard. Removing old strings gives you access to those hard-to-reach spots, and your guitar will thank you!
Installing New Strings

Now that you've got those old strings off, let's get those new ones on!
Start by inserting the ball end of each string through the bridge pin hole—trust me, a solid seat makes all the difference.
Then, pull the other end up through the tuning peg and wind it right; we want those coils neat and tight for a stable sound.
Proper String Insertion Technique
When I install new guitar strings, I focus on getting the insertion technique just right to guarantee peak performance. Mastering this technique is essential for maximum sound and playability.
Here's how I do it:
- Insert the string: I start by feeding the non-ball end of the new string through the bridge, bending it at a 90-degree angle above the ball-end to secure it in place.
- Pull through the tuning peg: Next, I pull the string up through the corresponding tuning peg, leaving about 2 to 3 inches of excess string. This guarantees stability and proper tension when I tune up.
- Wind correctly: I wind the string around the tuning peg in a clockwise direction for thick strings and counter-clockwise for thinner ones, making sure the coils are neat and stacked closely together.
- Trim excess: Finally, once all strings are installed, I trim any excess string tails to about 0.5 inches. This prevents sharp ends that could cause injury while I'm playing.
Winding for Stability
As I plunge into the winding process for my new guitar strings, I know that getting it right is crucial for stability and tuning accuracy. First off, I make certain to leave about 2 to 3 inches of excess string when I feed it through the tuning pegs. This little detail makes a huge difference in preventing slippage during tuning.
Now, I aim for 2 to 3 tight wraps around the tuning post. This isn't just about looks; it's about securing the string effectively. A solid winding helps maintain stability and keeps the string from slipping out of tune.
I keep in mind that the direction matters too—counter-clockwise for the bass strings and clockwise for the treble strings. This guarantees everything aligns neatly without overlap.
To speed things up, I whip out my trusty string winder. It helps maintain consistent tension, which is crucial for those even wraps.
Once I've finished winding, I gently stretch each string away from the fretboard. This little trick helps settle them into position, enhancing tuning stability for my next jam session. Trust me, mastering this process sets you up for success!
Tuning Your Guitar
Tuning your guitar is essential for getting the best sound out of your instrument, and I can't stress enough how much it can elevate your playing experience.
Whether you're jamming alone or performing in front of an audience, proper tuning is vital.
Here's how I approach tuning my electric guitar:
- Use an Electronic Tuner: I always start with an electronic tuner or a tuning app. It helps me achieve accurate pitch for each string, ensuring they're in standard tuning (EADGBE).
- Tune in Order: I begin with the lowest string (E) and work my way up to the highest string (e). This order maintains proper tension across the neck, which is significant.
- Stretch New Strings: After I restring my guitar, I gently stretch the new strings by pulling upward and releasing. This stabilizes their tuning and speeds up the settling process.
- Regular Checks: I make it a habit to check the tuning after playing for a while. New strings often need multiple adjustments to stay in tune.
Stretching and Adjustments

After putting on new strings, I always make it a point to stretch each one gently. It might seem trivial, but this simple act helps stabilize the tuning and reduces the time it takes for the strings to settle. I lift each string away from the fretboard, just enough to feel the tension change. Trust me, it's a game changer!
Once I've stretched each string, I recheck the tuning. Stretching alters the tension, so you might need to make some adjustments to achieve that perfect pitch. I recommend letting the strings settle for a few minutes before final tuning. This improves the overall stability and sound quality while you play.
Another tip I've learned is to trim the excess string ends to about 0.5 inches after tuning. You don't want sharp points that could snag your fingers while you're in the zone!
Regular stretching and tuning after installation not only enhances the strings' lifespan but also keeps your sound crisp and vibrant. So, don't skip this step—your guitar (and your audience) will thank you!
Maintenance Tips
Maintaining your guitar is just as essential as changing its strings, and trust me, a little care goes a long way. By incorporating some simple maintenance tips into your routine, you can keep your instrument in top shape and enhance its performance.
- Clean the fretboard with a microfiber cloth during string changes. This helps remove built-up dirt and oils, ensuring better playability and sound quality.
- Condition the fretboard a few times a year. Using a good fretboard conditioner keeps the wood moisturized, preventing cracks and dryness.
- Lubricate nut slots with graphite or a specialized lubricant. This improves tuning stability and prevents string binding, making your guitar easier to play.
- Inspect tuning pegs, bridges, and nuts regularly. Check for wear or damage during string changes to maintain overall functionality.
Variations by Guitar Type

Every guitar type has its own quirks when it comes to changing strings, so understanding these variations can make a world of difference in your playing experience.
For electric guitars, especially those with a Floyd Rose bridge, you'll need to handle the strings with care. You'll cut off the ball end, insert the string into the saddle, and make certain it's tightly secured. This attention to detail guarantees that your guitar stays in tune even during intense playing.
Now, if you're working with an acoustic guitar, the process is a bit different. You'll notice bridge pins holding the strings in place. Just gently pull those pins out with tweezers, feed the new strings through the bridge, and secure them back in.
And let's not forget classical guitars that use nylon strings. They require a unique knotting technique at the bridge—make certain that knot is secure to prevent any frustrating slips.
Resources for Learning
When it comes to learning how to change guitar strings, there's a treasure trove of resources out there just waiting for you.
Mastering this skill doesn't have to be overwhelming—lots of tools can guide you every step of the way. Here are some of my favorites:
- Online Video Tutorials: These are fantastic for visual learners. Many feature time-stamped segments that break down each step, making it easy to follow along.
- Step-by-Step Instructions: Look for articles or guides co-authored by professional guitarists. Some have garnered over 4.9 million views, proving their effectiveness in teaching string changes.
- Community Forums: Join online groups or forums where you can ask questions and share experiences. The support from fellow guitar enthusiasts can be invaluable.
- Mobile Apps: Explore apps tailored for guitarists. They can help you learn about string types, maintenance schedules, and even provide tuning assistance.
Conclusion
Changing your guitar strings might seem intimidating at first, but trust me, it's a rewarding skill to master. I remember when I first tackled this task; I was nervous but thrilled when I heard that fresh sound afterward. Just like that time I finally nailed a chord I'd struggled with, changing strings can open a whole new world of musical possibilities. So, don't hesitate—grab those tools and give it a shot! Your guitar deserves it, and so do you!
RELATED POSTS
View all


